Online payments let your customers pay for your goods and services through your website. Since online payments are usually automatic, they have lower labour costs than manual payment methods, such as cheque, money order, cash and EFTPOS. Online transactions quickly provide feedback to you and your customers.After processing delays, online payments generally go straight into your bank account, so they have a low risk of theft.
This article illustrates how payment gateway is integrated with pega.
Example Scenario :
ABC is an E-commerce company and they have initiated the online delivery method. For online order transactions, they are searching for the right platform to integrate payment gateway for their customer. Let’s have a look at how pega performs it .
CONFIGURATION:
Step 1 :
Register on https://www.instamojo.com/ to create your payment link .
Instamojo helps you collect payments online for anything that you sell online or offline.You can go ahead and create an account at Instamojo, get your account approved by submitting an ID proof and Address Proof. You are done!
After the successful registration, payment link will be generated for your account as mentioned below,

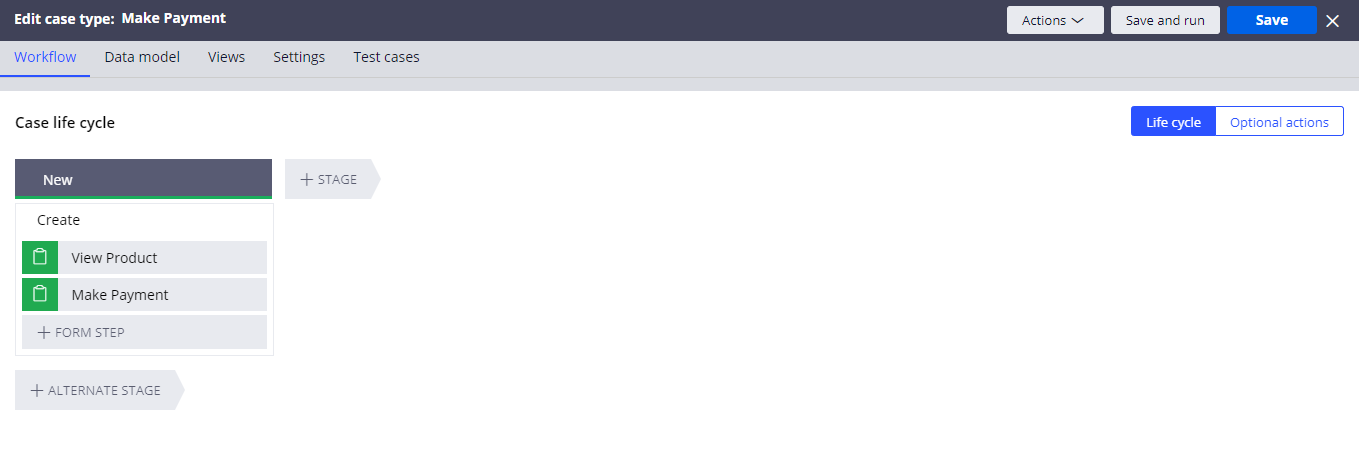
Step 2 :
Let’s start our design part. Open Dev Studio and Configure the castype called “Make Payment”. Add the two steps called “View Product” and “Make Payment”.
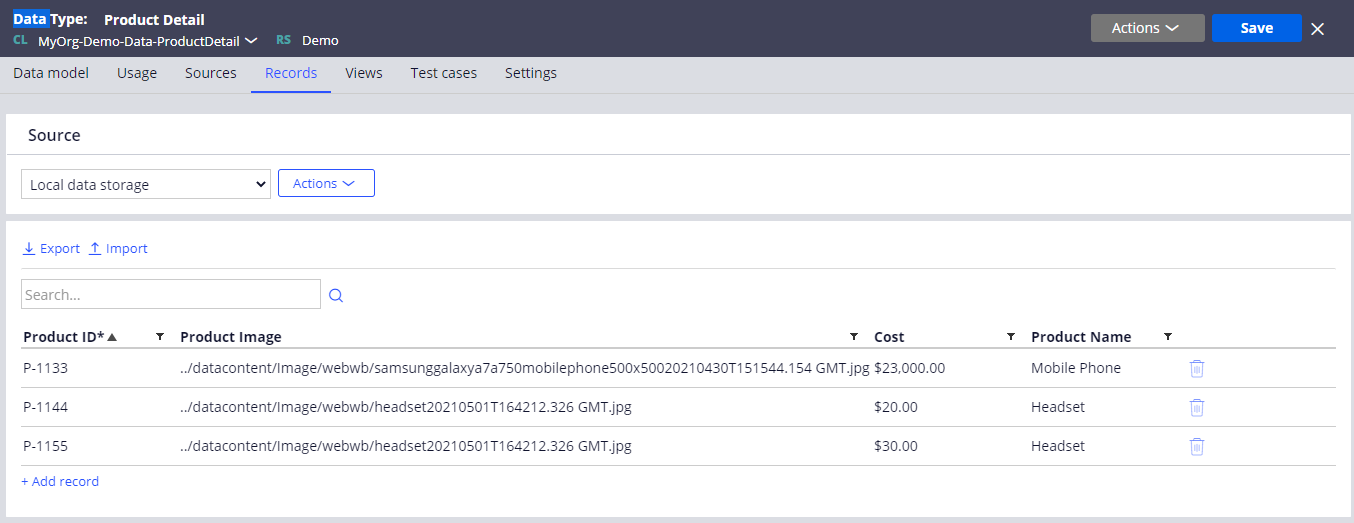
Step 3 :
Create datatype called Product Detail and add the required record as mentioned below,
Step 4 :
Now let’s start to design our section . Create the section under data class as we are going to use the property of data class for our section . Drag the required property inside the section as mentioned below,

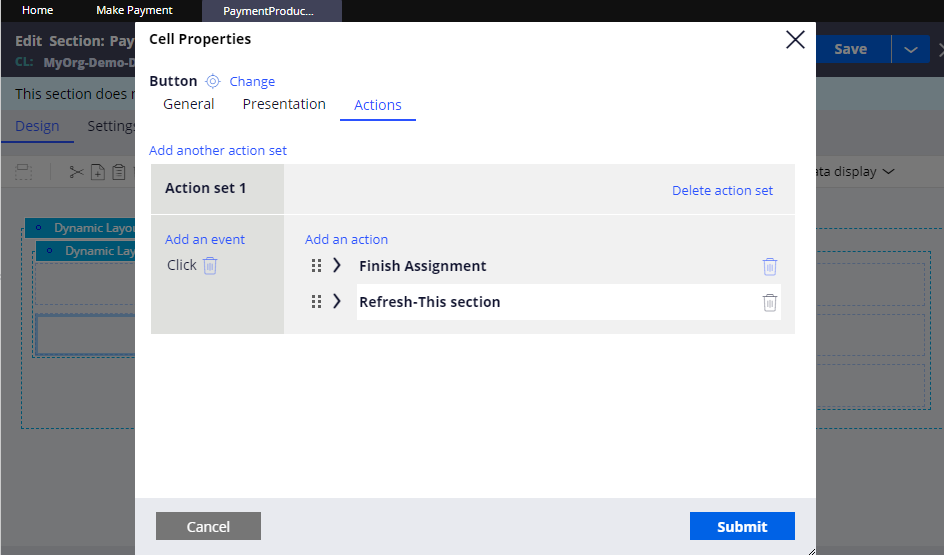
Step 5 :
Add a button called Buy and configure event Action Model. Configure Event as click and Action as Refresh Section and Finish Assignment –> Transition –> Move Forward.
Step 6:
Now open the Work class section ViewProduct. For requirements , I have added the product list as a drop down property called Search product. Use Repeating dynamic layout and update source as datapage and pass the drop down property called Search product. Also drag and drop the section that was created in data class to inside the Repeating Layout.


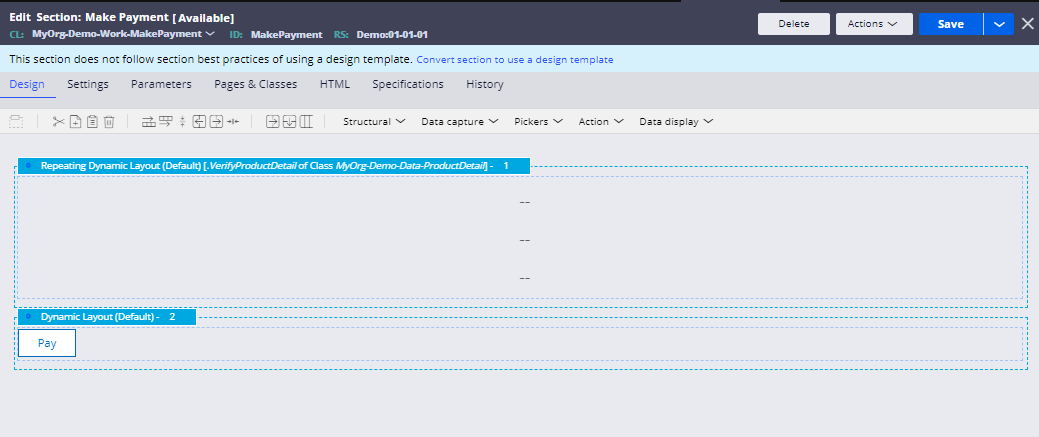
Step 7 :
Open the section called Make Payment and configure the section as per your requirement.
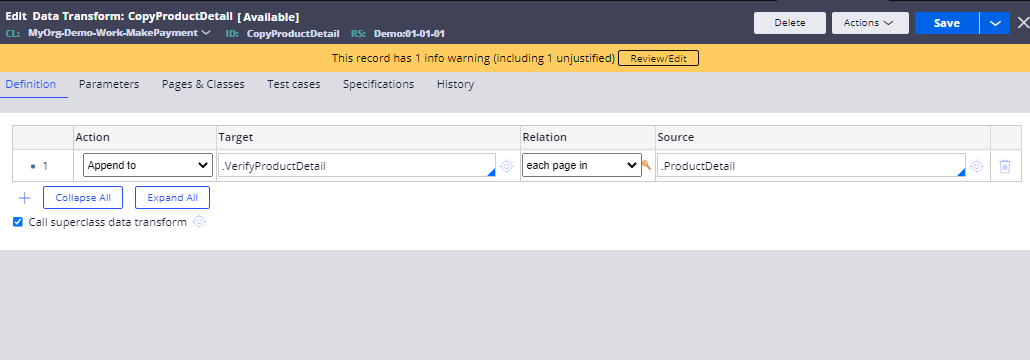
Step 8:
Create Data Transform called to pass the user selected product to make payment section. And call the Data transform in the respective flow.
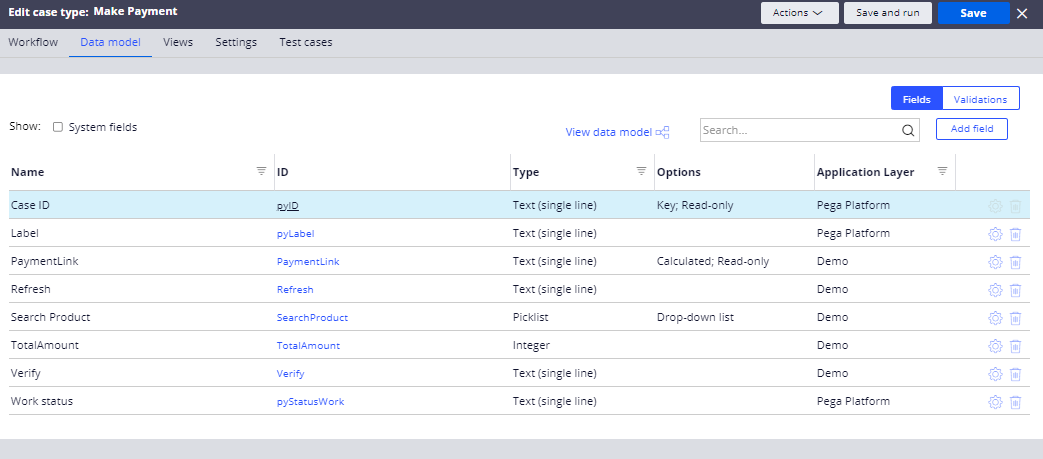
Step 9:
Create an Integer property called TotalAmount and text property called PaymentLink in the Data model of case type.
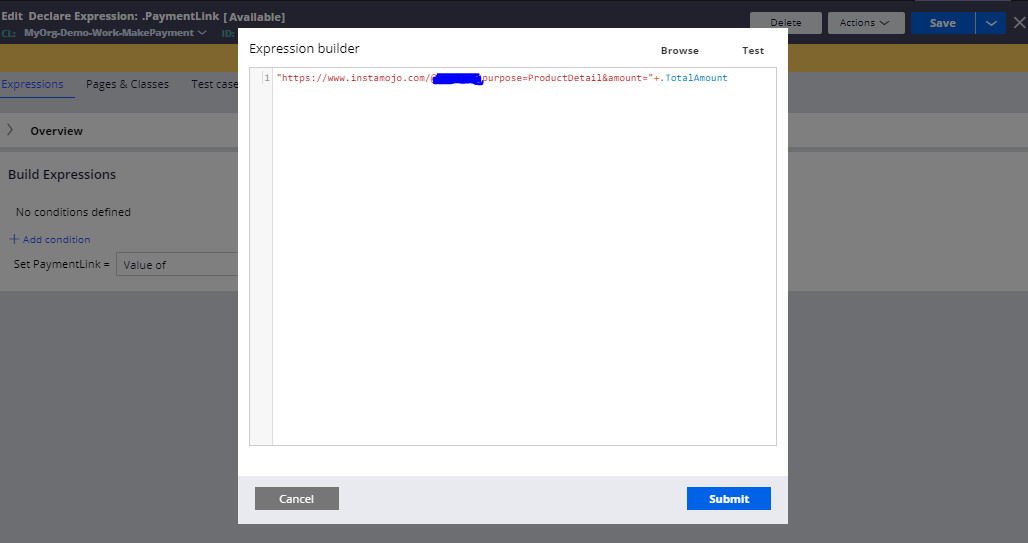
Step 10:
Create a Declare expression for Payment URL property and open the expression builder and add the payment link that we got using instamojo account.
The expression is as mentioned below,
“https://www.instamojo.com/…..?purpose=ProductDetail&amount=”+.TotalAmount
Step 11 :
Add Pay button in the Make Payment section . Configure Event as click and Action as Refresh section and call the Data transform called CopyAmount . The configuration are mentioned below ,

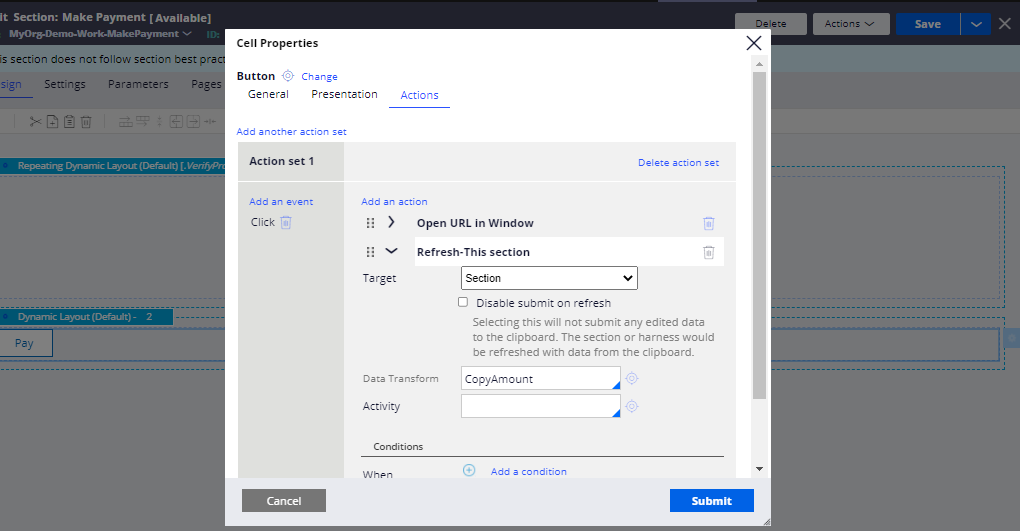
Also add another action called Open URL in Window and configure as mentioned below,

Save all rules.
Hurray!!! The implementation part is done!!! Let’s run and check it.
Output Image :
Customers search for the respective product and select the required one.
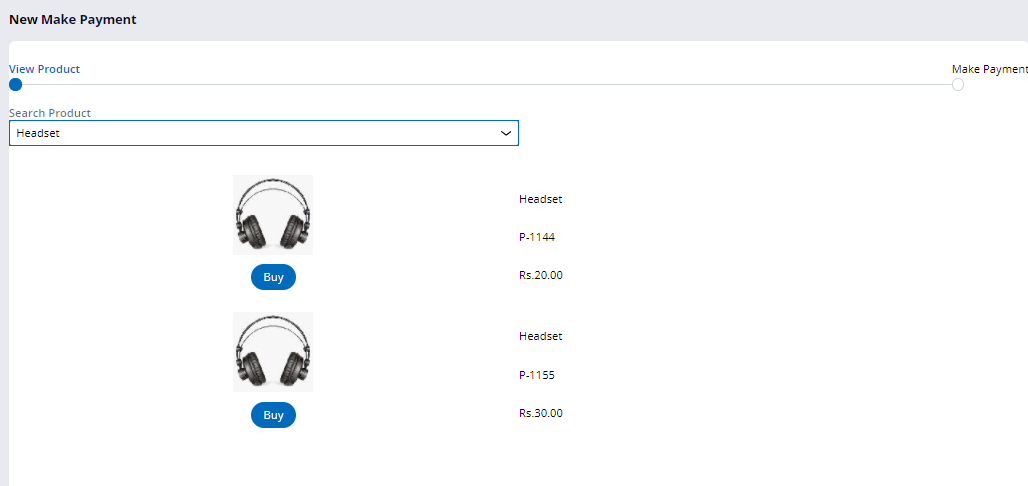
The selected product is available for payment and customers start their payment .


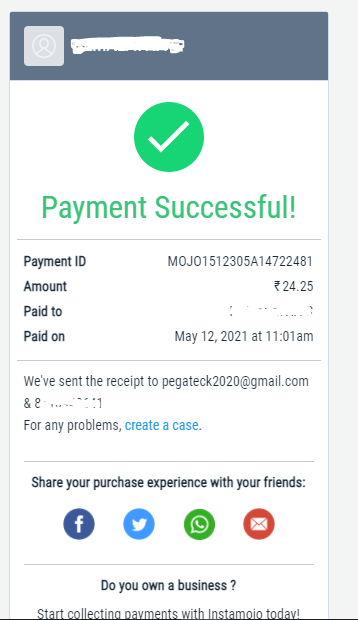
After the successful payment, mail and sms will be triggered to respective Email and mobile number.
Happy Learning !!
Thank you so much, helping allot for beginners like me
Afte payment is made how will pega application know that payment is successful??