Pega is expert in storing and maintaining data provided by the end user. Have you ever thought about how the pictures or images attached or provided as an input by the user gets stored in the pega database. This article illustrates how the image/pictures uploaded by the end user gets stored in the pega database.
Example Scenario:
ABC company uses pega platform to store and maintain its product details. The details include product name,ID and other related details along with product image. Let’s have a look at how pega performs it.
Configuration:
Step 1:
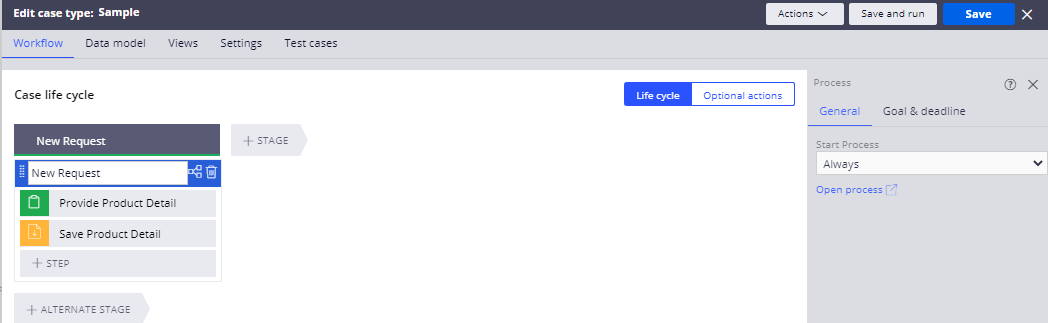
Create a case type (Eg: Sample) and provide a stage name as “New Request”. Add a collect info step name it as “Provide Product Detail”. Add another step by following the path: add step—-> More—->Automation—>Savable Datapage—-> click Select. Hurray! We are done desigining our case life cycle.
Step 2 :
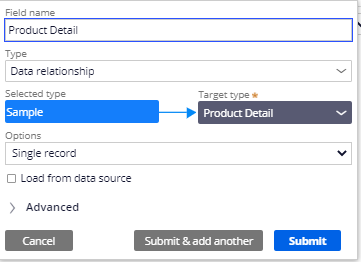
Create a datatype “Product Detail” via clicking Data explorer—> add datatype—->give the label as Product Detail—>Submit. Once done with creating datatype add the necessary fields as shown below.

Step 3:
Configure section for the provide product detail step by clicking the step—-> In the contextual panel click configure view —-> add field name as product detail.
Step 4:
Create an attachment property name it as “Upload Product Image” and add it to the same section. Finally the section resembles as below

Step 5 :
Now it’s time to configure the topic of the day savable datapage.Click on Savable Product Detail and open the rule

Step 6:
Change the source to “Data transform” and provide a label as “Save product detail” and then click create and open.

Step 7:
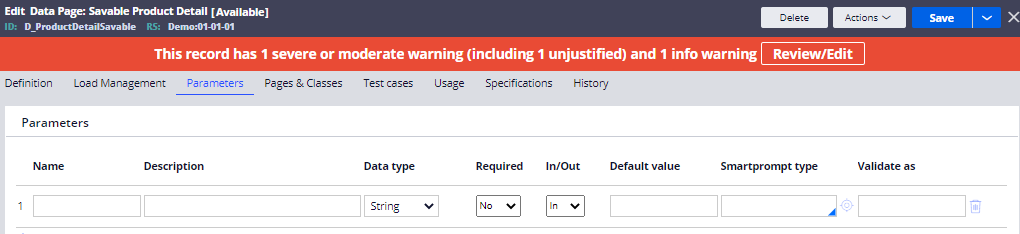
In the data transform under pages & classes tab provide work class along with page name.

Step 8:
under the definition tab, in 1st row, provide the Target as “Top” and Source as “pyWorkPage.ProductDetail”.
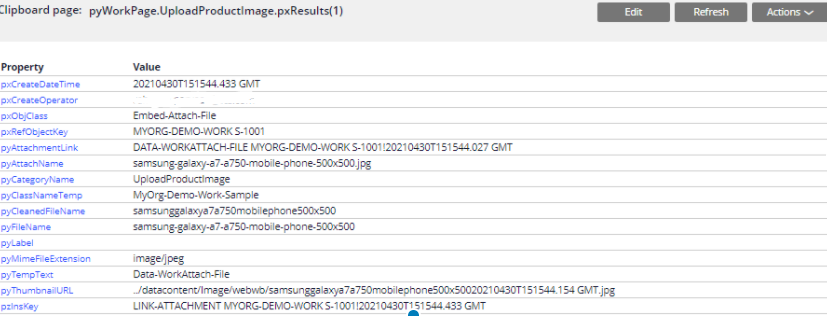
In the 2nd row, provide the target as “Product Image” and source as “pyWorkPage.UploadProductImage.pxResults(1).pyThumbnailURL”.
This is the clipboard page where the image attached in the attachment property is getting saved.
This represents the URL of the image attached in attachment property “Upload image” is copied and stored in the product image property of the product detail datatype. Click save.

Remove the Parameter defined under the parameters tab.
Step 9 :
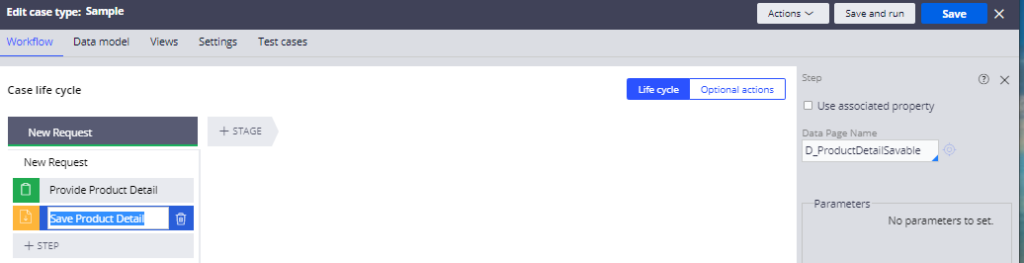
Call the Savable Datapage in the Casetype.
Hurray!!! The implementation part is done!!! Let’s run and check it.
Step 10:
Run the Sample casetype and enter the product detail and attach the product image.click submit.

Step 11:
Go to Product detail datatype and check whether the product details are saved under “Records” tab. To view the recent data click Action —>Refresh.

Fellas!! You can see the URL of the image along with the product detail is saved in the database.
We can also check with clipboard where the attachment property gets saved.
Youtube Video:
.