Data management is an important aspect to run a successful business. PEGA is expert in storing and maintaining data in the database provided by the end user. Have you ever thought about how PEGA handles all customer data efficiently? Let’s explore it…
This article illustrates how PEGA stores and maintains the data in the database.
Example Scenario :
ABC company is looking for the right platform to store and maintain its product details. As soon as the manager of the company adds a new product it has to get stored in the database along with the existing product. To achieve this, ABC company decided to use PEGA platform
CONFIGURATION:
Step 1:
Create a casetype (Eg: Sample) and provide a stage name as “New Request”. Add a collect info step and name it as “Provide Product Detail”. Add another step by following the path: add step—> More—->Automation—>Savable Datapage—-> click Select.

Hurray! We are done designing our case life cycle.
Step 2 :
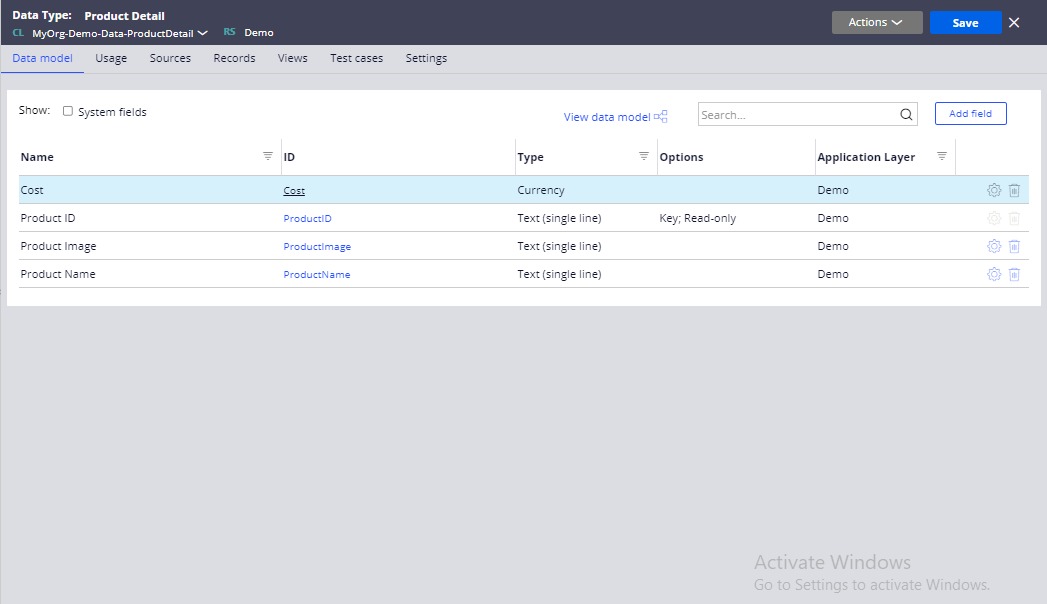
Create a datatype “Product Detail” via clicking Data explorer—> add datatype—->give the label as Product Detail—>Submit.Once done with creating datatype, add the necessary fields as shown below.
Step 3:
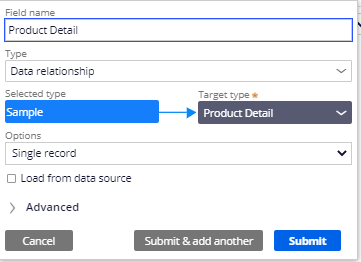
Configure section for the provide product detail step by clicking the step—-> In the contextual panel click configure view —-> add field name as product detail.

Now it’s time to configure the need of an hour “Savable Datapage”.
Step 4 :
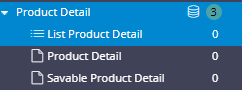
On the Data explorer, under the product detail datatype ,Click on Savable Product Detail and open the rule
Step 5:
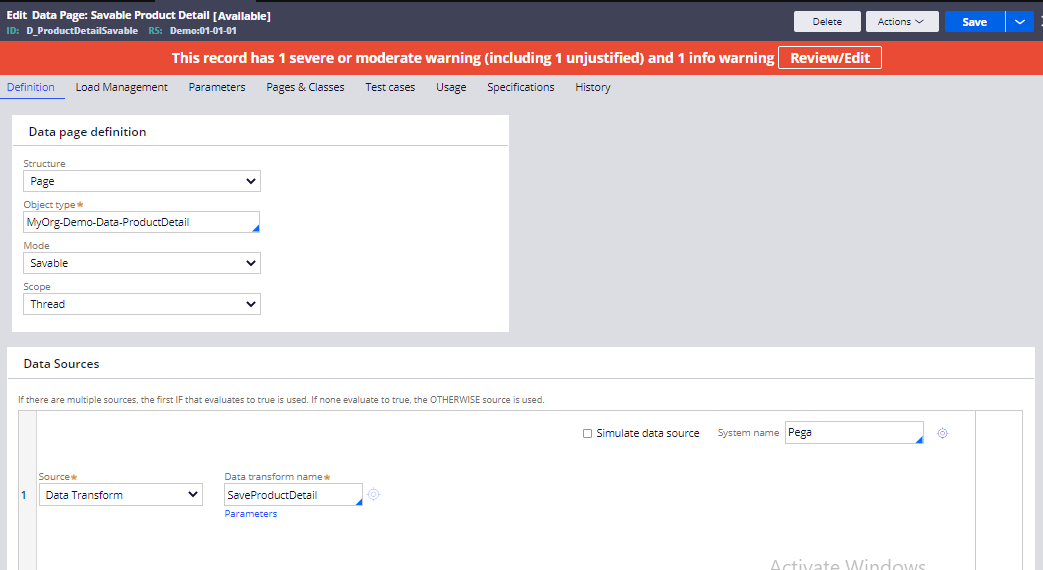
Change the source to “Data transform” and provide a label as “Save product detail” and then click create and open.
Step 6:
In the data transform, Under pages & classes tab provide work class from where you were going to access the property along with page name.

Step 7:
Under the definition tab, Provide the details as follows:
Action : Set
Source : pyWorkPage.ProductDetail
Target : Top
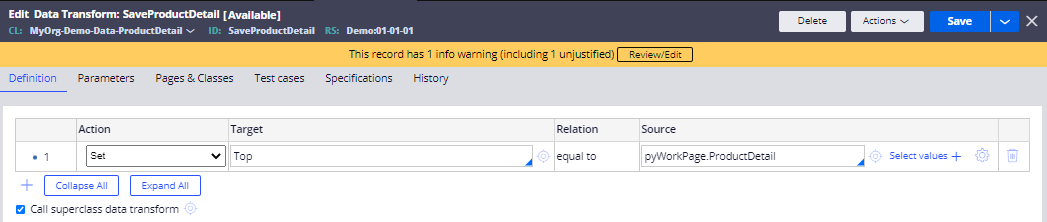
Note : Top is a keyword that identifies the top-level page to which the current embedded page belongs.
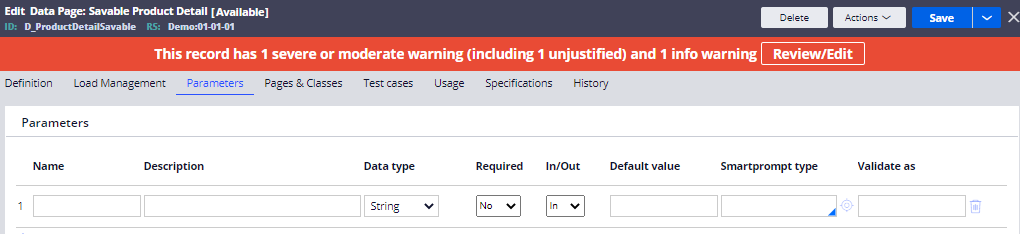
Delete the Parameter defined under the parameters tab.
Step 8:
Call the Savable Datapage in the Casetype.

Hurray!! The implementation part is done. Let’s run and check it.
Step 9 :

After submitting the case, go to “Product Detail” datatype and check whether the data is stored under records tab. Click Action—> Refresh to see the updated database.

Hurray !! The data is successfully stored.
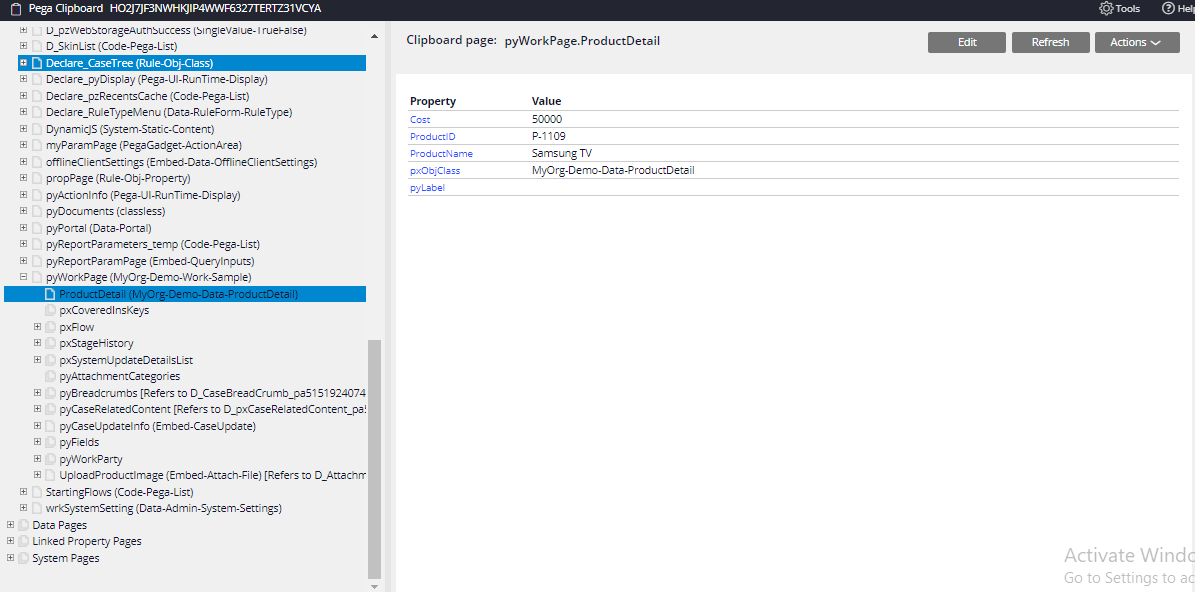
Step 10:
You can also check with clipboard, a separate page will be created in the name of datatype to store the data.

Youtube Video: